-
 ×
× - Home
- Art Prints ▸
- Artists ▸
- Categories ▸
- Art Styles ▸
- Picture Frame ▸
- All decorative frames
- Baroque decorative frames
- Simple decorative frames
- Rustic decorative frames
- Floating frames
- Golden decorative frames
- Silver decorative frames
- White decorative frames
- Black decorative frames
- Wood-look decorative frames
- Shabby chic decorative frames
- Thin decorative frames
- Thick decorative frames
- Print Media ▸
- All print media
- Canvas Leonardo (satin)
- Canvas Salvador (matte)
- Canvas Raphael (matte)
- FineArt Photo Matte
- FineArt Photo Satin
- FineArt Photo Baryte
- FineArt Photo Glossy
- Watercolor Paper Munch
- Watercolor Paper Renoir
- Watercolor Paper Turner
- Watercolor Paper Dürer
- Natural Line Hemp
- Natural Line Rice
- Kozo White, 110g
- Kozo Natural, 110g
- Inbe White, 125g
- Unryu, 55g
- Bamboo, 110g
- Premio Unryu, 165g
- Murakumo Natural, 42g
- Bizan Natural, 300g
- Bizan White, 300g
- Aluminum composite 3mm
- Acrylic glass 5mm
- Order Sample Set
- Which print medium is right for you?
Canvas
Photo Paper
Watercolor Board
Natural Line
Japanese Paper
Special Media
More information
- Help & Service ▸
- Contact us
- Sell your art
- Frequently Asked Questions
- Job Openings
- Complaint
- Order Samples
- Order Vouchers
- Shipping costs
- Production time
- Sustainability
- Image research
- Special requests
- Who are we?
- Pricing policy
- Company policy
- Quality promise
- Awards
- Stretcher frame
- Mats
- Decorative frames
- Glazing
- Fillets
- Mounting systems
- Print media
- Care tips
- Legal Notice
- Terms & Conditions
- Privacy Policy
- Right of Cancellation
Info & Service
More information
Good to know
Legal information
- Shop ▸
- Contact




 View in 3D / AR
 Add to favorites
 Change wall color
 View picture in a room
.jpg "92nd Gordon Highlanders in Retreat, Battle of Majuba Hill, 1st Boer War, 26-27 February 1881")
.jpg "British troops storming the Taku Forts in China in 1860 during the Opium Wars")
.jpg "The Insurrection in Herzegovina: Skirmish with an Austrian Outpost")
.jpg "The Routed Spaniards Clambered Up The Rugged Sides")
.jpg "Oua-Elgedjo Attack. Engraving by Laurent Desrousseaux to Illustrate the Story")
_Feller_-_The_Last_Eleven_at_Maiwand_(litho)_-_(MeisterDrucke-1087302).jpg "The Last Eleven at Maiwand")
.jpg "Frenchmen Proceeding to Attack the Spanish Fort on the St. Johns")
.jpg "The Assault on the Redan 1855 AD")
.jpg "An Incident in the Attack on Gallipoli, from")
.jpg "Charge of the Scots Fusiliers at Frederikstad (illustration from After Pretoria: The Guerilla War, 1902)")
.jpg "Gallant charge of the London Scottish")
.jpg "Black Troops of the Union Army bring in Captured Guns during the Siege of Petersburg (1864-65)")
.jpg "Carmichael")
.jpg "The Stormers dashed over the debris of the breach, illustration from")
.jpg "Foraging Party of the 67th Attacked by the Afghans, Nov 9, 1879, c1880")
.jpg "The Battle of Abu Klea, illustration from")
.jpg "The Punjaubees, After Firing A Volley, Rushed Down And Charged Them With The Bayonet")
_Wilson_-_The_Transvaal_War_-_(MeisterDrucke-1668346).jpg "The Transvaal War")
.jpg)
.jpg "The square at Abu-Klea")
.jpg "Battle of Palo Seco")
_Wood_-_Godbys_Brigade_making_a_gallant_stand_when_surrounded_by_the_Sikhs_Battle_of_Chi_-_(MeisterDrucke-1129298).jpg "Godby")
.jpg "British charging the Ashantis at Amoaful, 31st January 1874")
.jpg "Candahar: The 92nd Highlanders and the 2nd Gurkhas Storming Gaudi Mullah Sahibdad, from")
.jpg "Sir Henry Morton Stanley")
.jpg "Carmichael")
.jpg "The Battle of Majuba Hill")
.jpg "The Gross of the Bulgarian Column Made a Dashing Assault Upon the Town, Illustration from")
.jpg "The French Seize Milan")
.jpg "Charge of the 5th Lancers at Elandslaagte, 2nd Boer War")
.jpg "Arrival of the Nawab Siraj Ud Daulah before Clive")
.jpg "Up, Guards and at Them!, 1899")
.jpg "Battle of Majuba Hill, 1st Boer War")
.jpg "Brave Conduct of Sergeant Graham, Battle of Seringapatam")
.jpg "The Slave Market in Morocco, 1888")
.jpg "Fix Bayonets!: In the Trenches at Ladysmith")
.jpg "Attack in the Kuram Valley, 1901")
.jpg "Edward the Confessor Watching the Building of Westminster Abbey, c1050, c1920")
_-_(MeisterDrucke-1010308).jpg "The Battle of Elandslaagte: The Cavalry Charge")
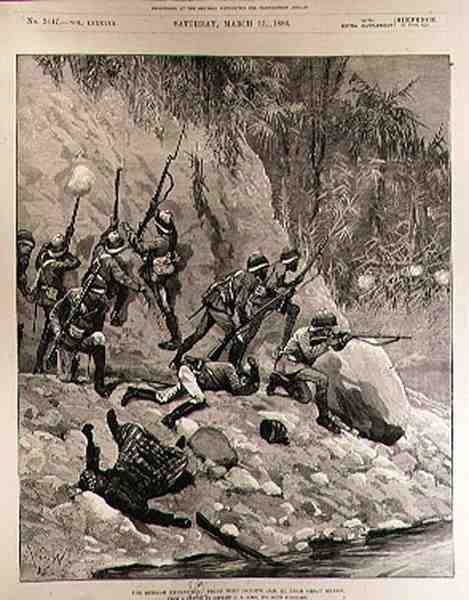
.jpg "The Burmah Expedition: Fight with Dacoits, January 12th, near Shoay Green")
.jpg "A Street Conjurer in Algiers, 1895")
.jpg "British Colonial Troops Burning a Rebel Boer")
.jpg "To the Wail of the Pipes, The Highland Soldiers Lament")
.jpg "Woman at Dawn")
.jpg "Via Appia")
.jpg "On the High Seas, Sunset at Pourville, 1882")
.jpg "View of Venice: The Ducal Palace, Dogana and Part of San Giorgio, 1841")
.jpg "Mont Sainte-Victoire")
.jpg "The Fourth Estate")
.jpg "A Vase of Roses, 1890")
.jpg "Pont Neuf, Paris")
.jpg "Hylas and the Water Nymphs")
.jpg "Wandering Shadows")
.jpg "The Quarrel of Oberon and Titania")
.jpg "Winter, c. 1910")
.jpg "Setting Sun, 1913")
.jpg "Abstract Horse, 1911")
_-_(MeisterDrucke-24378).jpg "Krumau - Crescent of Houses (The Small City V)")

 +43 4257 29415
 support@meisterdrucke.com
 Mo-Do: 7:00 - 16:00 | Fr: 7:00 - 13:00