-
 ×
×
- Home
- Art Prints ▸
- Artists ▸
- Categories ▸
- Art Styles ▸
-
Picture Frame ▸
- All decorative frames
- Baroque decorative frames
- Simple decorative frames
- Rustic decorative frames
- Floating frames
- Golden decorative frames
- Silver decorative frames
- White decorative frames
- Black decorative frames
- Wood-look decorative frames
- Shabby chic decorative frames
- Thin decorative frames
- Thick decorative frames
-
Print Media ▸
- All print media
- Canvas Leonardo (satin)
- Canvas Salvador (matte)
- Canvas Raphael (matte)
- FineArt Photo Matte
- FineArt Photo Satin
- FineArt Photo Baryte
- FineArt Photo Glossy
- Watercolor Paper Munch
- Watercolor Paper Renoir
- Watercolor Paper Turner
- Watercolor Paper Dürer
- Natural Line Hemp
- Natural Line Rice
- Kozo White, 110g
- Kozo Natural, 110g
- Inbe White, 125g
- Unryu, 55g
- Bamboo, 110g
- Premio Unryu, 165g
- Murakumo Natural, 42g
- Bizan Natural, 300g
- Bizan White, 300g
- Aluminum composite 3mm
- Acrylic glass 5mm
- Order Sample Set
- Which print medium is right for you?
Canvas
Photo Paper
Watercolor Board
Natural Line
Japanese Paper
Special Media
More information
-
Help & Service ▸
- Contact us
- Sell your art
- Frequently Asked Questions
- Job Openings
- Complaint
- Order Samples
- Order Vouchers
- Shipping costs
- Production time
- Sustainability
- Image research
- Special requests
- Who are we?
- Pricing policy
- Company policy
- Quality promise
- Stretcher frame
- Mats
- Decorative frames
- Glazing
- Fillets
- Mounting systems
- Print media
- Care tips
- Legal Notice
- Terms & Conditions
- Privacy Policy
- Right of Cancellation
Info & Service
More information
Good to know
Legal information
- Shop ▸
- Contact





 View in 3D / AR
 Add to favorites
 Change wall color
 View picture in a room
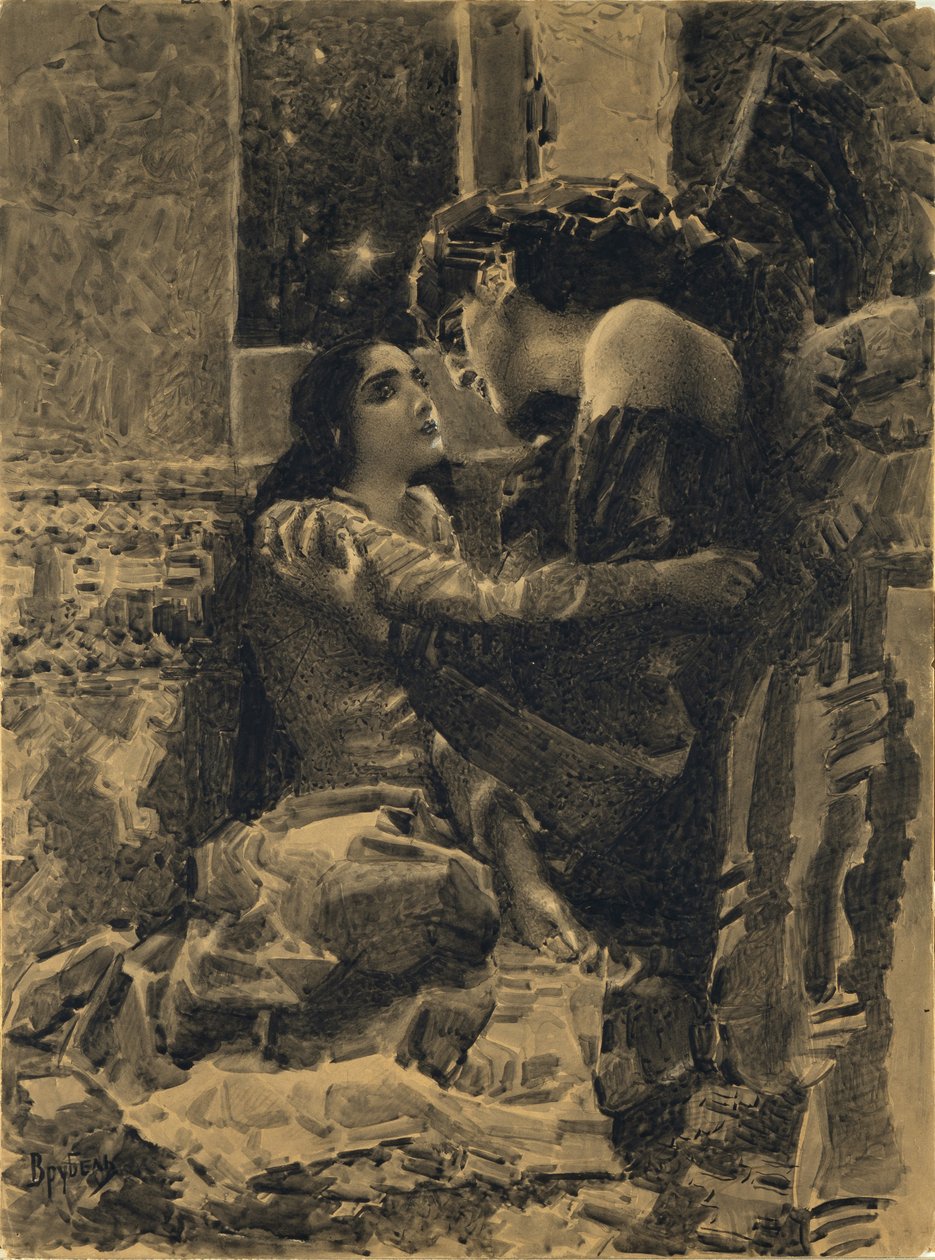
.jpg "Tamara and the Demon (Illustration of the Poem")
.jpg "Tamara and the Demon. Illustration to the poem The Demon by Mikhail Lermontov, 1890-1891")
.jpg "Decameron - Fifth Day, Story 4 - The Nightingale")
.jpg "Sir Pelleas, Looking In, Saw Sir Gawaine Stoop and Kiss the Lady Ettard")
_Burne-Jones_-_Love_among_the_ruins_-_(MeisterDrucke-1352319).jpg "Love Among the Ruins")
_-_(MeisterDrucke-1642341).jpg "Marie Adelaide of Savoy with Madame de Maintenon")
.jpg "Death of Paolo and Francesca: the wife of Francesca Da Rimini")
.jpg "Nice neck! That an executioner would be happy to cut it off! King Henry VIII of England (1491-1547) with his wife, Catherine Parr (1512-1548). Engraving from 1871 in Histoire Des Cocus Celebres by Henry de Kock (1819-1892)")
_-_(MeisterDrucke-1098945).jpg "Print")
.jpg "Edward III and the Countess of Salisbury")
_-_(MeisterDrucke-1303623).jpg "Illustration for Hamlet: Hamlet and the Queen (III,4)")
.jpg "Love Among The Ruins")
.jpg "Illustration of H de Hem for")
.jpg "Hamlet: Hamlet and the Queen")
_slamed_on_the_knees_of_an_older_woman_who_m_-_(MeisterDrucke-1483136).jpg "Young woman visibly suffering (sick) slamed on the knees of an older woman who makes her take a potion (medicine) (etching)")
.jpg "Hamlet: Hamlet and the Queen, 1834")
_heliography_-_(MeisterDrucke-1419245).jpg "Samson and Delilah")
.jpg "The Wedding Ring")
.jpg "Illustration on Romeo and Juliet by Shakespeare. Lithography, circa 1880")
.jpg "Henry II and fair Rosamund")
.jpg "Mona Lisa - in")
_-_(MeisterDrucke-1747933).jpg "Othello Suite: No. 9 (Act 4, Scene 3: The Willow Romance)")
.jpg "Advertisement for Romeo And Juliet, Starring Emma Abbott, Grand Opera Company")
.jpg "The Maid of Orleans in Prison")
.jpg "Interview Between Octavian and Cleopatra")
.jpg "The Death of Sardanapalus")
.jpg "The Death of Sardanapalus")
.jpg "Heloise and Abelard Kissing, Illustration from")
.jpg "La fiancee du roi de Garbe - in “Tales et nouvelles en vers” by Jean La Fontaine. 1776. Illustration by P.P. Choffard")
 - (MeisterDrucke-20670).jpg "Demon (sitting)")
_-_(MeisterDrucke-875886).jpg "The Seated Demon")
.jpg "The Swan Princess, 1900")
 1905 (charcoal and gouache on paper) - (MeisterDrucke-43380).jpg "The Six Winged Seraph, from")
 1890s - (MeisterDrucke-63588).jpg "The Snow Maiden, a sketch for the Opera by Nikolai Rimsky-Korsakov (1844-1908), 1890s")
.jpg "Reclining Nude, 1902")
.jpg "Tamara and the Demon. Illustration to the poem The Demon by Mikhail Lermontov, 1890-1891")
_1904_-_(MeisterDrucke-381996).jpg "Six-winged Seraphim (Azrael), 1904")
_-_(MeisterDrucke-136131).jpg "Head of a Demon, 1890")
.jpg "Princess Swan, 1900")
.jpg "Pan, 1899")
.jpg "Morning, 1897")
.jpg "Lilacs")
.jpg "The Seated Demon, 1890")
.jpg "The garden of the magician Klingsor, from the Parzival cycle, Great Music Room, c. 1883-84")
.jpg "Impression, Sunrise, 1872")
.jpg "Still Life: Vase with Cornflowers and Poppies, 1887")
.jpg "Castle and Sun")
.jpg "Girl with a Pearl Earring")
.jpg "The Terrace at the Restaurant Jacob in Nienstedten on the Elbe")
.jpg "Reclining Nude Woman Reading a Book")
.jpg "The Geneva Window, eight panels depicting scenes from early Irish literature, 1929")
.jpg "P. S. Krøyer")
.jpg "Kneeling Woman in an Orange-Red Dress")
.jpg "Reclining Female Nude")
.jpg "Portrait of Joan of Arc with flag and lilies against the background of Notre-Dame Cathedral")
 - (MeisterDrucke-770).jpg "Holy Trinity (Troitsa)")
.jpg "Tilla Durieux 1880-1971 as Circe, c.1913")
_-_(MeisterDrucke-368837).jpg "Boy Viewing Mount Fuji, 1839")

 +43 4257 29415
 support@meisterdrucke.com
 Mo-Do: 7:00 - 16:00 | Fr: 7:00 - 13:00