support@meisterdrucke.com  ·  0043 4257 29415

Deutsch English Italiano Español Français Nederlands Português Svenska Polski Dansk
Search by artist, work title or style – e.g. Monet, Starry Night, Impressionism, Hokusai wave, nude. Describe the scene – e.g. green meadow, abstract with lots of red, dark oil painting, standing nude next to a tree.

Colonel Plumer

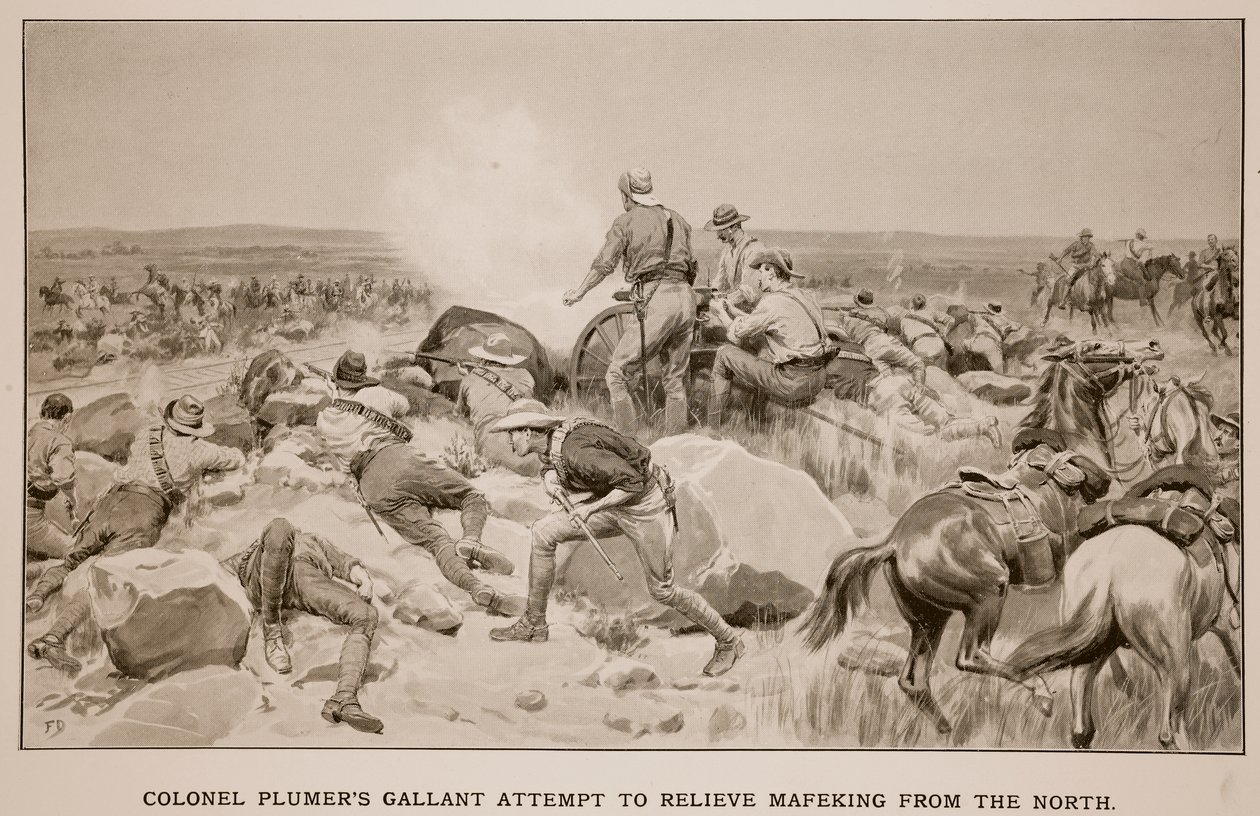
Colonel Plumer's Gallant Attempt to Relieve Mafeking from the North, after F.J. Mackenzie

(Colonel Plumer's Gallant Attempt to Relieve Mafeking from the North, after F.J. Mackenzie )


Frank Dadd

€ 125.42
Enthält 0% MwSt.
   Configure art print
Undated  ·  lithograph  ·  Image ID: 244033

Nonclassified artists  ·  Newspapers and Illustrations

Colonel Plumer's Gallant Attempt to Relieve Mafeking from the North, after F.J. Mackenzie by Frank Dadd. Available as an art print on canvas, photo paper, watercolor board, natural paper, or Japanese paper.
lieutenant-colonel · south africa · 2nd boer war · boers · fleeing · horses · horse · cavalry · soldiers · british army · fighting · soldier · military uniform · attack · attacking · battlefield · skirmish · battle · advance · advancing · firing · aiming · shooting · guns · death · dying · rifle · rifles · cannon · shot · train tracks · track · Mafikeng · Private Collection / Bridgeman Images
AR/3D   View in 3D / AR zu Favoriten hinzufügen   Add to favorites    Change wall color    View picture in a room
0 Reviews

Configure art print

Picture Frame

Medium & Stretcher

Glass & Passepartout

Miscellaneous & Extras

 Save / compare configuration
Preview Icon

Summary

Gemälde
Veredelung
Keilrahmen
Museumslizenz

€ 125.42
(inkl. 20% MwSt)
   Add to cart

Bildschärfe: PERFEKT

If you'd like us to adjust the brightness, colors, or crop the image, we're happy to do this for you at no extra cost. Just get in touch!

Similar artworks selected for you

Brilliant Defence by New Zealanders at Holspruit, February 25, 1902 The charge of the Inniskillings: the Battle of Pieter The Mishap to the Victorians at Wilmansrust, June 12, 1901 The last stand of the Johannesburg police at Bergendal (illustration from After Pretoria: The Guerilla War, 1902) Blüchers Marsh to Waterloo The Attack on a Train at Holfontein A Black Regiment in Action, from Harper With General French: New Zealanders saving a picket of the Yorkshire Regiment near Slingersfontein on January 15, from a sketch by G.D. Giles Boers firing on General French From Frere to Chieveley - difficulties of transport Gold Escort Attacked by Bushrangers, Australia, 1879 Battle at Wilson Tommy Illustration of the Battle of Little Bighorn, 25th June The destruction of De Wet De Wet A Reconnaissance in force with General French The War for the Union, 1862—A Bayonet Charge A shell from the Naval Brigade dispersing Boers from behind the Seven Sisters Kojes during the action of the 7th March Battle of Plevna. July 30, Attack on the Heights Battle of Plevna. July 30, Attack on the Heights, 1883-1890 Ruse by which the Boers captured a The City of London Imperial Volunteers at Doornkop on the 29th of May The Ambuscade at Koorn Spruit, illustration from The Battle of Majuba Hill Major Boole-Smith Tackles De Wet, from After Pretoria: The Guerilla War Lord Methuen Rallying His Broken Forces at Tweebosch Charge of the Scots Fusiliers at Frederikstad (illustration from After Pretoria: The Guerilla War, 1902)
Show more similar artworks

Similar artworks selected for you

Brilliant Defence by New Zealanders at Holspruit, February 25, 1902 The charge of the Inniskillings: the Battle of Pieter The Mishap to the Victorians at Wilmansrust, June 12, 1901 The last stand of the Johannesburg police at Bergendal (illustration from After Pretoria: The Guerilla War, 1902) Blüchers Marsh to Waterloo The Attack on a Train at Holfontein A Black Regiment in Action, from Harper With General French: New Zealanders saving a picket of the Yorkshire Regiment near Slingersfontein on January 15, from a sketch by G.D. Giles Boers firing on General French From Frere to Chieveley - difficulties of transport Gold Escort Attacked by Bushrangers, Australia, 1879 Battle at Wilson Tommy Illustration of the Battle of Little Bighorn, 25th June The destruction of De Wet De Wet A Reconnaissance in force with General French The War for the Union, 1862—A Bayonet Charge A shell from the Naval Brigade dispersing Boers from behind the Seven Sisters Kojes during the action of the 7th March Battle of Plevna. July 30, Attack on the Heights Battle of Plevna. July 30, Attack on the Heights, 1883-1890 Ruse by which the Boers captured a The City of London Imperial Volunteers at Doornkop on the 29th of May The Ambuscade at Koorn Spruit, illustration from The Battle of Majuba Hill Major Boole-Smith Tackles De Wet, from After Pretoria: The Guerilla War Lord Methuen Rallying His Broken Forces at Tweebosch Charge of the Scots Fusiliers at Frederikstad (illustration from After Pretoria: The Guerilla War, 1902)
Show more similar artworks

More art prints by Frank Dadd

The Letter, 1910 A Merry Christmas, from the Pears Annual, 1907 The Veteran Oath of vengeance (illustration from After Pretoria: The Guerilla War, 1902) Marching Order, The Kings Royal Rifle Corps formerly 60th Rifles A Winter Tommy Convalescing soldiers playing chess in a ward at Sulhampstead House Hospital, Berkshire, c.1918 Tired Soldiers Enjoying a Rest, from After Pretoria: The Guerilla War Follow the Drum Phrenology, 1820-1886 The moment of farewell: A touching scene at Victoria Station during war time, 1915 Sisters Those Laugh Who Win, 1885 Professional Gentleman, 1883
Show more works by Frank Dadd

More art prints by Frank Dadd

The Letter, 1910 A Merry Christmas, from the Pears Annual, 1907 The Veteran Oath of vengeance (illustration from After Pretoria: The Guerilla War, 1902) Marching Order, The Kings Royal Rifle Corps formerly 60th Rifles A Winter Tommy Convalescing soldiers playing chess in a ward at Sulhampstead House Hospital, Berkshire, c.1918 Tired Soldiers Enjoying a Rest, from After Pretoria: The Guerilla War Follow the Drum Phrenology, 1820-1886 The moment of farewell: A touching scene at Victoria Station during war time, 1915 Sisters Those Laugh Who Win, 1885 Professional Gentleman, 1883
Show more works by Frank Dadd

More motifs from the category Newspapers and Illustrations

The Rebel Sepoys at Delhi 1857 AD The Blue Hawk and the Little Brown Lizard, 1749-73 Caricature of the Triple Alliance of Germany, Austria and Italy, from John Rejoices to Hear of Fitz-Peters Death AD1198, 1920 Awful Invocation of a Spirit, illustration to The Battle of Lepanto The Dandy, published by Hannah Humphrey Tiger Attacking a British Officer, Back Cover Illustration from The Battle of Lake Erie, Commodore O.H. Perrys Victory, 1878 For the Victims of Duty: The Battle of Flowers, from Nöteborg Illustration from Travels to the Great Duke of Muscovy and the King of Persia by Adam Ol Military review by Paul Doumer, Governor General of French Indochina, and Emperor of Annam, Thanh Thai, in Hanoi, front cover illustration from Le Petit Journal, Supplement Illustre, 27th April 1902 Scenes in the Life of a Trapper, from Study of the Upper Level of the Medici Tomb The Golden-Winged Flycatcher and the Spotted Tortoise Butterfly
View More from "Newspapers and Illustrations"

More motifs from the category Newspapers and Illustrations

The Rebel Sepoys at Delhi 1857 AD The Blue Hawk and the Little Brown Lizard, 1749-73 Caricature of the Triple Alliance of Germany, Austria and Italy, from John Rejoices to Hear of Fitz-Peters Death AD1198, 1920 Awful Invocation of a Spirit, illustration to The Battle of Lepanto The Dandy, published by Hannah Humphrey Tiger Attacking a British Officer, Back Cover Illustration from The Battle of Lake Erie, Commodore O.H. Perrys Victory, 1878 For the Victims of Duty: The Battle of Flowers, from Nöteborg Illustration from Travels to the Great Duke of Muscovy and the King of Persia by Adam Ol Military review by Paul Doumer, Governor General of French Indochina, and Emperor of Annam, Thanh Thai, in Hanoi, front cover illustration from Le Petit Journal, Supplement Illustre, 27th April 1902 Scenes in the Life of a Trapper, from Study of the Upper Level of the Medici Tomb The Golden-Winged Flycatcher and the Spotted Tortoise Butterfly
View More from "Newspapers and Illustrations"

A selection of our top sellers

The School Walk, 1872 Buddha Satan Viewing the Ascent to Heaven, c.1827 Delicate Tension No. 85, 1923 Ascending Road The Almond Tree in Blossom, 1947 By the Beach, 2007 The Letter Carrier in Rosenthal Mother Mushroom with her Children, c. 1900 The Grand Canal, Venice, Looking Southeast, with the Campo della Carità to the Right, 1730s. Composition C; Composition No. III; Composition with Red, Yellow Dominant Curve, 1936 Ice Floes at Bennecourt Annunciation, 1472-75 (after restoration) Standing half-nude with brown shirt
Show more artworks

A selection of our top sellers

The School Walk, 1872 Buddha Satan Viewing the Ascent to Heaven, c.1827 Delicate Tension No. 85, 1923 Ascending Road The Almond Tree in Blossom, 1947 By the Beach, 2007 The Letter Carrier in Rosenthal Mother Mushroom with her Children, c. 1900 The Grand Canal, Venice, Looking Southeast, with the Campo della Carità to the Right, 1730s. Composition C; Composition No. III; Composition with Red, Yellow Dominant Curve, 1936 Ice Floes at Bennecourt Annunciation, 1472-75 (after restoration) Standing half-nude with brown shirt
Show more artworks


What our customers think about us


Frequently Asked Questions about Meisterdrucke


Personalizing your art print at Meisterdrucke is simple and intuitive: Choose a frame, set the image size, pick a printing medium, and add suitable glazing or a stretcher frame. We also offer additional customization options like mats, fillets, and spacers. If you have any questions, our customer service team is ready to help you create your perfect artwork.

At Meisterdrucke, you can visualize your configured artwork directly in your own room. Simply upload a photo of your space and see how the artwork looks in it. If you're visiting us on a mobile device — phone or tablet — our augmented reality feature brings the picture to life and projects it right into your room. A unique experience that combines art and technology.

Choosing the right medium is often a matter of personal taste. To give you a better idea, we've provided some images for each medium. We also offer a sample set of all paper variants, so you can decide not just visually but by touch as well. You can order the sample set free of charge — only shipping costs apply.

Don't worry! At Meisterdrucke, we don't just process orders mechanically. Every order is manually reviewed by our team. If we spot any inconsistencies or issues with your configuration, we'll get in touch with you right away. And of course, our friendly and patient support team is always here to help you with your configuration. We'll work with you by phone or email to adjust your image so the final result is exactly what you had in mind.


Still have questions?

Are you interested in an art print from our manufactory but still unsure? Do you need advice on choosing the medium or help with the order?

Our experts are happy to assist you.

+43 4257 29415
support@meisterdrucke.com
Mo-Do: 7:00 - 16:00 | Fr: 7:00 - 13:00

Still have questions?

Are you interested in an art print from our manufactory but still unsure? Do you need advice on choosing the medium or help with the order?

Our experts are happy to assist you.

+43 4257 29415
support@meisterdrucke.com
Mo-Do: 7:00 - 16:00 | Fr: 7:00 - 13:00


Meisterdrucke

   Kärntner Strasse 46
        9586 Finkenstein am Faaker See
        Austria
        +43 4257 29415
        support@meisterdrucke.com
Other languages

                   
Erfahrungen & Bewertungen zu Meisterdrucke
Post.at DHL Express Quehenberger Cargoboard
Kaiser Franz Joseph

Meisterdrucke
Kärntner Strasse 46
9586 Finkenstein am Faaker See · Austria
+43 4257 29415 · support@meisterdrucke.com
Post.at DHL Express Quehenberger Cargoboard


(c) 2026 meisterdrucke.uk